Monday, May 4, 2009

Dessert: Is this the end...or just the beginning?

Wow! Congratulations!! You’ve reached the final tapas. Be sure to give yourself a pat on the back for completing the program. But before sending this off you, I ask for one last discovery post.

For your last and final exercise for this program please reflect on your learning journey and post a few thoughts. Here are some questions to prompt you if you're drawing a blank ...
  • What were your favorite discoveries or exercises on this learning journey?
  • How has this program assisted or affected your lifelong learning goals?
  • Were there any take-aways or unexpected outcomes from this program that surprised you?
  • What could we do differently to improve upon this program’s format or concept?

And last but not least…

  • If we offered another discovery program like this in the future, would you again chose to participate?

In closing, we want to thank each and every one of you for joining on this journey. We have enjoyed reading your blogs, listening to your comments and questions, and discovering how much creativity there is at the NJSL! Our greatest hope is that this not the end of our learning journey together as a staff and a library, but rather it’s just the start of something amazing …

Thank you!
Bob and Andrea

Friday, April 24, 2009

Eleventh Course: Discover some useful search tools for locating podcasts

The word podcast is used to refer to a non-musical audio or video broadcast that is distributed over the Internet. What differentiates a podcast from regular streaming audio or video is that the delivery method for podcasts is often done automatically through RSS.

In 2005, "podcast" was named the "word of the year" by New Oxford American Dictionary and with the growth of podcasting over the last few years, it's easy to see why.

Podcasts take many forms, from short 1-10 minutes commentaries (like the ones used in this Technology Tapas program) to much longer in person interviews or panel group discussions. There’s a podcast out there for just about every interest area and the best part about this technology is that you don’t have to have an iPod or a MP3 player to access them. Since podcasts use the MP3 file format, a popular compressed format for audio files, you really just need a PC (or Mac, or portable device) with headphones or a speaker.

iTunes, the free downloadable application created by Apple is the directory finding service most associated with podcasts, but if you don’t have iTunes installed there are still plenty of options.

For this discovery exercise participants are asked to take a look at some popular podcast directory tools. Do some exploring on your own and locate a podcast that is of interest to you. Once found, you can easily pull the RSS feed into your Bloglines account as well, so that when new casts become available you’ll be automatically notified of their existence.

Discovery Resources:


Discovery Exercise:

  1. Take a look at the two podcast directories listed and see if you can find a podcast that interests you. See if you can find some interesting library related podcasts here like book review podcasts or library news.
  2. Add the RSS feed for a podcast to your Bloglines account
  3. Create a blog post about your discovery process. Did you find anything useful here?

Monday, April 20, 2009

Tenth Course: Discover YouTube and a few sites that allow users to upload and share videos

Within the past year online video hosting sites have exploded allowing users to easily to upload and share videos on the web. Among all the web 2.0 players in this area, YouTube is currently top dog serving up well over 1 million video views a day and allowing users not only to upload their own video content easily, but also embed clips into their own sites easily.

Do some searching around YouTube yourself and see what the site has to offer. You'll find everything from 1970s TV commercials and 80s pop icons to library dominos and kids at the dentist. Of course, like any free site you’ll also find a lot stuff not worth watching too. But that doesn’t mean you shouldn’t explore and see for yourself what the site has too offer. :)

Discovery Exercise:
  1. Explore YouTube & find a video worth adding as an entry in your blog.
  2. Create a blog post about your experience. What did you like or dislike about the site and why did you choose the video that you did? Can you see any features or componets of the site that might be interesting if they were applied to library websites?

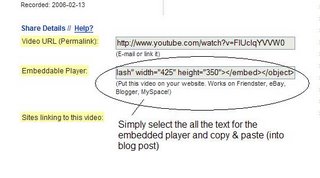
    OPTIONAL: Try placing the video inside your blog using the copy and paste code for the for "Embeddable Player.” Note: you'll need to use Blogger's Edit HTML tab when pasting this code.

Other popular video hosting sites:
NOTE: Videos, like music downloads, are bandwidth hogs. It is recommended that you complete this exercise during light internet usage times.

Ninth Course: Explore Flickr and learn about this popular image hosting site.

Photo sharing websites have been around since the 90s, but it took a small startup site called Flickr to catapult the idea of “sharing” into a full blown online community. Within the past year, Flickr has become the fastest growing photo sharing site on the web and is known as one of the first websites to use keyword “tags” to create associations and connections between photos and users of the site.

For this discovery exercise, you are asked to take a good look at Flickr and discover what this site has to offer. Find out how tags work, what groups are, and all the neat things that people and other libraries are using Flickr for.

Discovery Resources:

Discovery Exercise:

In this discovery exercise, you have two options…

  1. Take a good look around Flickr and discover an interesting image that you want to blog about. Be sure to include either a link to the image or, if you create a Flickr account, you can use Flickr's blogging tool to add the image in your post.

    -- OR --

  2. If you're up to an easy challenge ... create a Free account in Flickr and use your location's digital camera to capture a few pictures of something in your branch. Upload these to your Flickr account and tag at least one of the images “NJSLTT” and mark it public. Then create a post in your blog about your photo and experience. Be sure to include the image in your post.

So go ahead, explore the site and have some Flickr photo fun and if you're interested in looking at some photo hosting sites, then why not check out Jamie's recommendations & this Wired story. (Thanks Jamie for the link).

PS: A quick word about photo posting etiquette - When posting identifiable photos of other people (especially minors) is it advisable to get the person's permission before posting their photo in a publicly accessible place like Flickr. Never upload pictures that weren't taken by you (unless you have the photographer's consent) and always give credit when you include photos taken by someone else in your blog.

Tuesday, April 7, 2009

Eighth Course: Playing around with PBWiki

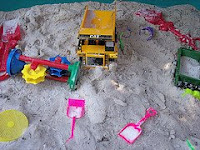
Trucks in a sandbox picture "Sandbox" is the term that wikis often use to describe the area of the website that should be used for pure play. For this discovery and exploration exercise, we’ve set up a whole Technology Tapas sandbox wiki*that’s for nothing but play!

For this “explore-and-play-with-wikis” exercise, you are asked to add an entry or two to the NJ State Library Technology Tapas wiki. The theme of this wiki is simply “Favorites” : Favorite books, favorite vacation spots, favorite restaurants, favorite anything …all you need to do is play and add your thoughts. To mark your adventure on this site, you should add your blog to the Favorite Blogs page.

Discovery Resources:

Discovery Exercise:
1. Access the NJ State Library Technology Tapas wiki and create a login account for yourself (FYI, if you are already a member of PBWiki, say if you're updating the SCILS manual wiki, you don't have to create a new account. Just use your current log in information).
2. Add your blog to the Favorite Blogs page. That's how we'll know that you've been there. It’s easy to do if you follow this simple syntax:
Example:
[ URL Title of blog]
[http://njsllearning.blogspot.com Technology Tapas ]
With brackets [ ] and just a little typing, you’ve added a link - yup, it’s as easy as that!
OPTIONAL: Add a favorite or two to a few other pages (Favorite books, favorite vacation spot, etc). And, if you feel up to the challenge, you might even want to create a separate page for book review or short travel essay and link up to that.
3. Create a post in your blog about the experience.

*NOTE: The NJ State Library Technology Tapas wiki was created using the free version of PBWorks (formerly PBWiki), a tool that lets you create webpages that anyone can edit.

Seventh Course: What's in a wiki?

Cat on a computer picture; caption says I'm in your wiki, altering your reality A wiki is a collaborative website and authoring tool that allows users to easily add, remove and edit content. Wikipedia, the online open-community encyclopedia, is the largest and perhaps the most well known of these knowledge sharing tools. With the benefits that wikis provide the use and popularity of these tools is exploding.
Some of the benefits that make wikis so attractive are:
  • Anyone (registered or unregistered, if unrestricted) can add, edit or delete content.
  • Tracking tools within wikis allow you to easily keep up on what been changed and by whom.
  • Earlier versions of a page can be viewed and reinstated when needed.
  • And users do not need to know HTML in order to apply styles to text or add and edit content. In most cases simple syntax structure is used.

As the use of wikis has grown over the last few years, libraries all over the country have begun to use them to collaborate and share knowledge. Among their applications are pathfinder or subject guide wikis, book review wikis, ALA conference wikis and even library best practices wikis.

Discovery Resources:

Use these resources to learn more aboout wikis:

Discovery Exercise:

For this discovery exercise, you are asked to take a look at some library wikis and blog about your finding. Here’s a few examples to get you started:

Create a blog post about your findings. What did you find interesting? What types of applications within libraries might work well with a wiki?

Tuesday, March 31, 2009

Sixth Course: Web-based Applications and Discovering Web 2.0 Tools

The availability and use of online productivity web-based applications (think word processing and spreadsheets) has exploded over the past two years and for good reasons! These powerful applications provide users with the ability to create and share documents over the internet without the need of installed desktop applications. Some experts speculate that this emerging trend may mean the death to Microsoft Office and other software-based productivity tools, while others think web-based applications have their place, but not in the office. But no matter which side of the office suite platform you side with, on this both sides seem to agree; web-based apps have their place.

One large benefit to web-based applications it that they eliminate the need to worry about different software versions or file types as you email documents or move from PC to PC. Another bonus is that they easy accommodate collaboration by allowing multiple users to edit the same file (with versioning) and provide users the ability to easily save and convert documents as multiple file types (including HTML and pdf). And, you can even use many of these tools, such as Zoho Writer and Google Docs* (formerly known as Writely) to author and publish posts to your blog. It’s this type of integration with other Web 2.0 tools that also makes web-based apps so appealing.

For this discovery exercise, participants are asked to take a look at a web-based word processing tool called Zoho Writer, create a simple document and then document your discoveries in your blog. If you're up to the challenge, you might even export your document as an HTML file or publish it through Zoho to your blog.

With Zoho and web-based applications, the possibilities are endless.

Throughout the course of this Learning 2.0 program we’ve explored just a small sampling of these new internet technologies and websites that are empowering users with the ability to create and share content. But given time there are so many more we could explore. Current estimates place the number of web 2.0 tools at somewhere between 300 & 500 with only a handful emerging as market dominators. And although time will only tell which of these new collaborative, social networking and information tools will remain on top, one
thing is for sure, they're not going to go away (at least anytime soon).

For this discovery exercise, participants are asked to select any site from this list of Web 2.0 Awards nominees and explore it. With so many to choose from, it might be handy to first select a category that interests you (like Books or Personal Organization) and then simply select a tool/site to explore. Be careful to select a tool that is Free and that doesn't require a plug-in or download. The majority of these are free, so this shouldn’t be a problem.

Discovery Exercise:
  1. Create a free account for yourself in Zoho Writer.
  2. Explore the site and create a few test documents of two.
  3. Try out Zoho Writer’s features and create a blog post about your discoveries.
  4. Select any site/tool from the list of Web 2.0 Awards nominees. (If you prefer to select from just the winners, here’s a link to the short list.)
  5. Explore the site you selected.
  6. Create a post about your discovery. What did you like or dislike about the tool? What were the site’s useful features? Could you see any applications for its use in a library setting?
Optional: If you're up for the challenge, try using Zoho’s "publish" options to post to your blog.

* Note: You can also explore Google Docs (formerly known as Writely), Google's online word processer, as an option for this exercise. On Oct 11th, Google relaunched Writely (which it acquired in Spring 2006) as Google Docs.
Fifth Course: Tagging and Social Bookmarking

This week we are going to take a look at what tagging is on the Web and how social bookmarking sites like Delicious use tags to organize information.

Tagging is an open and informal method of categorizing that allows users to associate keywords with online content (webpages, pictures & posts). Unlike library subject cataloging, which follows a strict set of guidelines (i.e.Library of Congress subject headings), tagging is completely unstructured and freeform, allowing users to create connections between data anyway they want.

Delicious is a social bookmarking manager which allows you to bookmark a web page and add tags to categorize your bookmarks.

Many users find that the real power of Delicious is in the social network aspect, which allows you to see how other users have tagged similar links and also discover other websites that may be of interest to you. You can think of it as peering into another users’ filing cabinet, but with this powerful bookmarking tool each user's filing cabinet helps to build an expansive knowledge network.

Another great use of Delicious is having all your bookmarks in one place. Many of us have a computer that we use at work as well as one at home. We might also use a friend's computer or a computer at the public library. When we've bookmarked sites in the past those bookmarks stayed on whatever computer we made them on. With Delicious, when you want to use a bookmark it does not matter what computer you were at when you saved it. Simply log in to your Delicious account and no matter where you are you will have access to all of your bookmarks.

For this discovery exercise, you are asked to take a look at Delicious and learn about this popular bookmarking tool.

Discovery Resources:

Discovery Exercise:

  1. View the 8 minute Del.icio.us tutorial to get a good overview of its features.
  2. Take a look around Delicious using Bob's Delicious account. Note: In this account you may find some pretty strange things so be prepared!
  3. Explore the site options and try clicking on a bookmark that has also been bookmarked by a lot of other users. Can you see the comments they added about this bookmark or the tags that they used to categorize this reference?
  4. Create a blog post about your experience and thoughts about this tool.
    Can you see the potential of this tool for research assistance? Or just as an easy way to create bookmarks that can be accessed from anywhere?


OPTIONAL: If you’re up to the challenge, create a Delicious account for yourself and discover how this useful bookmarking tool can replace your traditional browser bookmark list.

Note: If you do setup a Delicious account, here’s a quick word about the Delicious Buttons. On PCs that have the toolbars locked down, these will install as options in your browser bookmarks. Use the “Post to my Delicious” link to add the current webpage to your account (you may need to log in). Use the “My Delicious” link to view your online account.

Sunday, March 29, 2009

Fourth Course: Make life really simple with RSS

You've heard of RSS? You've seen those small funny tags on websites? You've heard co-workers and acquaintances swear by it, but still have no idea what RSS is? Well, you're about to find out! In the information world, RSS is not only revolutionizing the way news, media and content creators share information, but it is also swiftly changing the way everyday users are consuming information.

RSS stands for "Really Simple Syndication" and is a file format for delivering regularly updated information over the web.

Just think about the websites and news information sources you visit every day. It takes time to visit those sites and scour the ad-filled and image-heavy pages for just the text you want to read, doesn't it? Now imagine if you could visit all those information sources and web pages in just one place and all at the same time...without being bombarded with advertising...without having to search for new information on the page you'd already seen or read before...and without having to consume a lot of time visiting each site individually. Would that be valuable to you? Well, it's available now through a newsreader and RSS.

This week's discovery exercises focus on learning about RSS news feeds and setting up a Bloglines account (a free online newsreader) for yourself to bring your feeds together.

Discovery Resources:
  • Feed Me: A gental introduction to Internet feeds - a good tutorial from Palinet, a library cooperative; it's from 2005, so some of the feed readers look a little different now
  • Using Bloglines Tutorial (how to keep up with dozens of blogs every day) - This online tutorial walks you through how to setup a Bloglines account and add newsfeeds. Follow steps 1 to 3 to set up your Bloglines account. Step 4-9 are optional and cover how to subscribe to different types of feeds (podcasts, Flickr albums, etc)
  • RSS Reader How To - This video tutorial provides information on creating a bloglines account, adding feeds, and making folders.

Discovery Exercises:

  1. Follow the discovery resources above to learn more about RSS and newsreaders.
  2. Create a free online Bloglines accout for yourself and subscribe to at least 10 newsfeeds to your reader. See Using Bloglines Tutorial steps 1-3 for instructions.
    News feeds:
    Participant blog feeds- Subscribe to several of your co-workers' feeds. This is as easy as typing the blog URL into the subscribe field in Bloglines. Try it; it's easy!
    Select some of these interesting blogs-
    The Technology Tapas feed
    The "M" Word--Marketing Libraries
    Simply Amazing--Peggy Cadigan's Blog
    Unshelved--Library Cartoon Feed
    Library Stuff--Library news and updates
    Lolcats--Funny captions for cat pictures (One of Andrea's favorite non-work websites!)
  3. Create a post in your blog about this exercise. Optional: if you're up to the challenge, you can provide the URL address to your public Bloglines account (find out where to locate this below).

Don't know what to blog about? Thing about these questions:

  • What do you like about RSS and newsreaders?
  • How do you think you might be able to use this technology in your work or personal life?
  • How can libraries use RSS or take advantage of this new technology?

How to find your public Bloglines URL (or watch this tutorial!):

  1. Go into your account settings
  2. Click on the tab for Blog Settings
  3. Create a user name
  4. Check the button for "Yes, publish my blog roll" in the section "Show My Blogroll"
  5. Save changes
  6. In the left-hand pane, click on "Share" under "Additional Options"
  7. Your URL will appear under the section "/public" Note: it will follow the pattern: http://www.bloglines.com/public/USERNAME

In conclusion, here is the link to my public Bloglines account: http://www.bloglines.com/public/ASimzak

Why have a public account? To share blog rolls with others, of course!

P.S. Once you tackle this discovery exercise, you've tackled the most difficult one of the whole 13. :)

Third Course: Grab yourself a blog in three steps

Now that you’ve done some exploring around this website and understand how this program will work, it’s time to set up your very own personal blog to begin recording your thoughts, discoveries and exercises in. For this program, we recommend that you use Blogger*, a popular free online blog hosting service that is extremely easy to use.

Creating a blog using Blogger takes just three steps:
  1. Create an account (view screenshot)
  2. Name your blog (view screenshot) Note: You may need to try several different URLs before you find one that isn't already in use. You can also ignore the Advanced Options.
  3. Select your template.

Once you’ve created your blog here are two important things to know:

  • To add posts: The maintenance interface that you will use to add posts, edit or change the step-up your blog is accessed online at http://www.blogger.com/ Be sure to write down your login and password.
  • To view your blog: Your blog address is http://(xxxx).blogspot.com, (xxxx)=the unique identifier you entered in Step 2. Be sure to also write down your blog address.

If you run into problems or would like more information about blogs and using Blogger here are some discovery resources you can use:

OK -- Now, it’s your turn...

Discovery Exercise:

  1. Setup a blog for yourself through Blogger.
  2. Add a test post or two. Note: Use one of your test posts to create an entry about the habits among the 7 and 1/2 lifelong learning habits that is easiest and hardest for you & why.
  3. Have fun!!!!

IMPORTANT NOTE: How you choose to identify yourself on your blog is your choice. You can blog under a screen name, anonymously, or as yourself. However, in order to qualify for the staff incentives and staff day prize drawings, you will need to email your blog's URL to Bob Keith or Andrea Simzak and include it in the comments section of the next post.

* Use of Blogger is only a recommendation. If there is another blog hosting site that you are more comfortable with, please feel free to use it.

Tuesday, March 17, 2009

Second Course: Lifelong Learning

Among libraries, lifelong learning is one of those core values we shelve our books by. So it makes sense that before we embark on this new online learning and discovery journey that we should take a few minutes to review a few habits that can assist in creating lifelong learners.

These habits, which we’ve called the Seven and 1/2 Habits of Highly Successful Lifelong Learners, will provide you with a refresher on what it means to be a lifelong learner.

Discovery Exercise:
  1. Make sure you have headphones or speakers attached to your computer.
  2. Open up the 7 & 1/2 Habits online tutorial and view the online tutorial.
  3. As you watch and listen, write down which habit among the 7 & 1/2 that is easiest for you and which is hardest. You will use your personal blog (which you will set up next) to post your thoughts about lifelong learning.

Here are some additional links from Lori Reed (the tutorial's creator) as follow-up. They are also the attached documents from the tutorial, so if they cannot be opened there, you can access them here:

Have fun! If you haven't jumped on board yet, it's never too late to become a lifelong learner.

Friday, March 13, 2009

First Course: Let's get started...

Welcome to NJSL's Technology Tapas program & blog. Chances are if you've found your way here you're either:


  1. a member of the NJSL staff who's participating in the Technology Tapas Challenge
  2. interested in learning about and playing around (yes, playing is allowed in libraries) with some new web 2.0 tools that will help you expand your information literacy toolbox.

Either way… We're glad you're here!!

Technology Tapas is an online learning program that encourages staff to learn more about emerging technologies on the web that are changing the way people, society and libraries access information and communicate with each other. Over the course of the next sixweeks, this website will highlight Web 2.0 through discovery exercises to help staff become familiar with blogging, RSS news feeds, tagging, wikis, podcasting, online applications, and video and image hosting sites.

To familiarize yourself with this project, be sure to read the FAQ page. The information there should answer most of your questions about this program. If not, then please add your question to the FAQ page as a comment. So fasten your seat belts, grab your mouse and get ready for a discovery adventure… and remember, it's OK to play in the library and have fun!Be sure to tune in Wednesday, March 25 for the next "thing" or discovery item ... or better yet, subscribe to the RSS feed.